
Hey there! I'm an Oil Preform Mould supplier, and today I'm going to walk you through the process of installing an oil preform mould. Whether you're a newbie in the industry or just looking to refresh your knowledge, this guide will give you all the info you need.
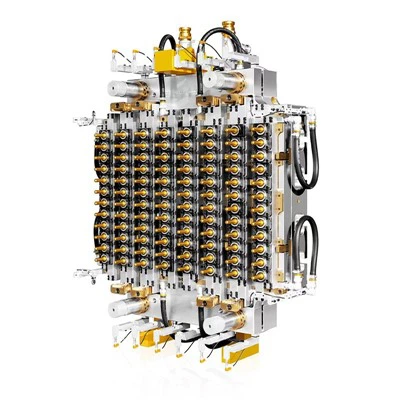
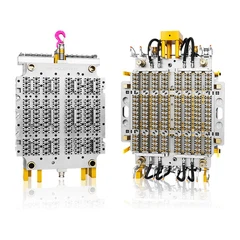
First things first, let's talk about why you might need an Oil Preform Mould. These moulds are crucial for producing high - quality preforms for oil bottles. They're designed to ensure that the preforms have the right shape, size, and thickness, which is essential for the final product's performance.
Pre - installation Preparations
Before you start the installation process, you need to make sure you have everything ready. First, check the mould itself. Inspect it for any signs of damage, like cracks or scratches. If you find any issues, it's better to address them before installation to avoid problems later on.
Next, gather all the necessary tools. You'll typically need wrenches, screwdrivers, and maybe some measuring tools. Make sure these tools are in good condition and the right size for the job.


Also, prepare the injection moulding machine. Clean it thoroughly and make sure it's in proper working order. Check the temperature control system, the hydraulic system, and the electrical connections. A well - maintained machine is key to a successful mould installation.
Step - by - Step Installation
- Positioning the Mould
Place the oil preform mould on the injection moulding machine's platen. Make sure it's centered properly. You can use alignment pins or guides to help with this. If the mould isn't centered, it can lead to uneven wear and tear, and the preforms might not be formed correctly. - Mounting the Mould
Use the appropriate bolts or clamps to secure the mould to the platen. Tighten the bolts evenly to ensure a good fit. Don't overtighten them, as this can damage the mould or the machine. You might want to use a torque wrench to get the right amount of tightness. - Connecting the Cooling System
Most oil preform moulds have a cooling system to control the temperature during the injection process. Connect the cooling lines to the mould. Make sure the connections are tight and there are no leaks. You can use a pressure test to check for leaks before starting the machine. - Setting up the Hot Runner System (if applicable)
Some oil preform moulds use a hot runner system to deliver the molten plastic to the cavities. If your mould has a hot runner, connect it to the machine's hot runner controller. Set the temperature and pressure according to the manufacturer's recommendations. This step is crucial for getting a consistent flow of plastic into the mould. - Electrical Connections
If there are any electrical components in the mould, like sensors or heaters, connect them to the machine's electrical system. Double - check the connections to make sure they're secure and there are no short circuits.
Testing and Fine - Tuning
Once the mould is installed, it's time to test it. Start the injection moulding machine and run a few test cycles. Check the preforms that are produced. Look for any defects, like flash, short shots, or warping.
If you notice any issues, you'll need to fine - tune the machine settings. Adjust the injection speed, pressure, and temperature to get the best results. You might also need to make some minor adjustments to the mould, like adjusting the alignment or tightening the clamps a bit more.
Maintenance Tips
After the installation and testing are done, it's important to maintain the oil preform mould properly. Regularly clean the mould to remove any plastic residue or debris. Lubricate the moving parts to ensure smooth operation.
Inspect the mould regularly for signs of wear and tear. Replace any worn - out parts as soon as possible to avoid more serious problems.
Related Products
If you're interested in other types of preform moulds, we also offer PET Water Bottle Preform Mold and PET Preform Injection Mould 96cav. These moulds are designed to meet different production needs and can provide high - quality preforms for various applications.
Contact Us for Purchase
If you're in the market for an oil preform mould or any of our other products, don't hesitate to reach out. We're here to help you with all your moulding needs. Whether you have questions about the installation process, want to know more about our products, or are ready to make a purchase, we're just a message away.
References
- Injection Moulding Handbook, Third Edition by Ian I. Rubin
- Plastics Processing: Principles and Practice by Donald V. Rosato and Dominick V. Rosato