
Maintaining the cleanliness of a PET water bottle preform mold is crucial for ensuring the quality of the preforms and the overall efficiency of the production process. As a reputable PET Water Bottle Preform Mold supplier, I understand the significance of proper mold cleaning and its impact on the final product. In this blog post, I will share some effective methods and best practices for cleaning a PET water bottle preform mold.
Understanding the Importance of Mold Cleaning
A clean mold is essential for producing high - quality PET preforms. Over time, molds can accumulate various types of contaminants such as plastic residues, dust, and release agents. These contaminants can affect the surface finish of the preforms, lead to defects like flash or short shots, and even cause damage to the mold itself. Regular cleaning not only improves the quality of the preforms but also extends the lifespan of the mold, reducing the need for costly repairs or replacements.
Pre - Cleaning Preparations
Before starting the cleaning process, it is important to take some preparatory steps. First, ensure that the mold is completely cooled down. Working on a hot mold can be dangerous and may cause the cleaning agents to evaporate too quickly, reducing their effectiveness.
Next, gather all the necessary cleaning tools and materials. These may include soft - bristle brushes, lint - free cloths, cleaning solvents, and safety equipment such as gloves and goggles. It is also a good idea to have a detailed diagram of the mold on hand to identify all the components and areas that need to be cleaned.
Disassembly of the Mold
If possible, disassemble the mold into its individual components. This allows for a more thorough cleaning of each part. However, disassembly should be done carefully to avoid damaging any delicate parts. Follow the manufacturer's instructions for disassembly, and keep track of all the parts and their positions to ensure proper reassembly later.
Cleaning the Mold Components
Surface Cleaning
The first step in cleaning the mold components is to remove any loose debris. Use a soft - bristle brush to gently sweep away dust, plastic particles, and other loose contaminants from the surface of the mold. Be careful not to scratch the mold surface, as this can affect the quality of the preforms.
After removing the loose debris, apply a suitable cleaning solvent to a lint - free cloth. Wipe the surface of the mold with the solvent - soaked cloth to dissolve and remove any stubborn residues. There are various types of cleaning solvents available in the market, and it is important to choose one that is compatible with the mold material. For example, some solvents may be too harsh for certain types of steel used in the mold and can cause corrosion.
Cavity Cleaning
The cavities of the mold are where the preforms are formed, so it is crucial to keep them clean. Use a small - diameter brush or a specialized cavity cleaning tool to reach into the cavities and remove any plastic residues or contaminants. Pay special attention to the corners and edges of the cavities, as these areas are more likely to accumulate debris.
In some cases, ultrasonic cleaning can be an effective method for cleaning the mold cavities. Ultrasonic cleaners use high - frequency sound waves to create tiny bubbles in a cleaning solution. These bubbles implode near the surface of the mold, removing contaminants from hard - to - reach areas. However, ultrasonic cleaning should be used with caution, as it can potentially damage delicate mold components if not done correctly.
Cooling Channels Cleaning
The cooling channels in the mold play a vital role in maintaining the temperature of the mold during the injection process. Over time, these channels can become clogged with scale, rust, or other deposits, which can reduce the cooling efficiency. To clean the cooling channels, use a suitable cleaning agent and a flushing system. The cleaning agent should be able to dissolve the deposits without causing damage to the channels. After flushing the channels, rinse them thoroughly with clean water to remove any remaining cleaning agent.
Reassembly and Inspection
Once all the mold components are clean, it is time to reassemble the mold. Follow the reverse order of disassembly, making sure that all the parts are properly aligned and tightened. After reassembly, conduct a thorough inspection of the mold. Check for any signs of damage, such as cracks or scratches, and ensure that all the moving parts are functioning smoothly.


Regular Maintenance Schedule
To keep the PET water bottle preform mold in optimal condition, it is important to establish a regular maintenance schedule. Depending on the production volume and the type of plastic used, the mold may need to be cleaned after a certain number of production cycles. For example, in a high - volume production environment, the mold may need to be cleaned every few hundred cycles, while in a low - volume environment, cleaning once a week or once a month may be sufficient.
Conclusion
Cleaning a PET water bottle preform mold is a critical task that requires attention to detail and the use of proper techniques and tools. By following the steps outlined in this blog post, you can ensure that your mold remains clean and in good working condition, resulting in high - quality PET preforms and a more efficient production process.
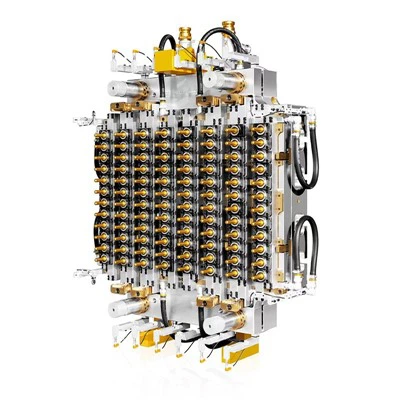
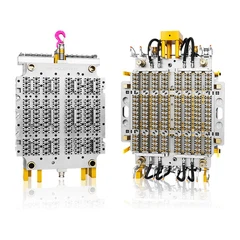
If you are in the market for a PET Preform Injection Mould 96cav, 96 Cavities PET Preform Mold, or PET Water Bottle Preform Mold, our company is here to provide you with high - quality solutions. We have a wide range of molds to meet your specific needs. If you are interested in our products, please feel free to contact us for more information and to discuss your procurement requirements.
References
- "Plastic Injection Molding Handbook" by Dominick V. Rosato and Donald V. Rosato
- "Mold Maintenance and Troubleshooting" by various industry experts in the plastic molding field